Detailing Your Car Like a Pro: Deep Clean at Home
Few things are as satisfying for a car enthusiast as stepping back from a freshly detailed vehicle and seeing mirror-like reflections across the paintwork. While professional details can cost hundreds of dollars, you can achieve impressive results at home with the right products, tools, and process.
This guide walks you through a full exterior and light interior detail, showing you how to safely wash, decontaminate, polish, and protect your car so it looks better than the day you bought it.
Step 1: Pre-Wash and Safe Contact Wash
The number one cause of swirl marks and fine scratches is improper washing. To minimise paint damage, always follow a two-stage wash:
Pre-Wash / Snow Foam
- Rinse the car thoroughly to remove loose dirt.
- Apply a layer of snow foam with a foam cannon or pump sprayer.
- Let it dwell for a few minutes (without drying) to soften grime.
- Rinse again from top to bottom.
This reduces the amount of abrasive dirt you’ll drag across the paint with your wash mitt.
Two-Bucket Method
- Use one bucket with soapy water and another with clean rinse water.
- Dip your wash mitt into the soapy bucket, wash a small section, then rinse in the clean bucket before reloading with soap.
- Always wash top-down: roof, glass, bonnet, upper panels, then bumpers and lower areas last.
Avoid automatic car washes with stiff brushes—they save time but can destroy delicate clearcoat over time.
Step 2: Decontamination – Iron and Tar Removal
Even after a careful wash, your paint may feel rough to the touch. Tiny particles of brake dust, industrial fallout, and road tar cling stubbornly to the surface.
- Use an iron remover spray on paint and wheels. It reacts with embedded iron, often turning purple as it dissolves contaminants.
- For stubborn tar spots, apply a dedicated tar remover with a microfiber cloth.
Rinse thoroughly after these steps to avoid staining or streaking.

Step 3: Clay Bar Treatment
Claying physically removes bonded contaminants that chemicals alone can’t shift.
- Use a clay bar or synthetic clay mitt with proper lubricant.
- Work in small sections, gliding the clay gently over the surface.
- Knead or clean the clay regularly to expose a fresh surface.
After claying, the paint should feel glass-smooth under your fingertips—a perfect base for polishing and protection.
Step 4: Paint Inspection and Light Polishing
Under good lighting (sunlight, LED inspection light, or in a shaded garage), look closely at the paint:
- Light swirls and haze can often be corrected with a one-step polish.
- Heavier defects may require a compound and a multi-step correction, but that’s beyond the scope of a quick DIY.
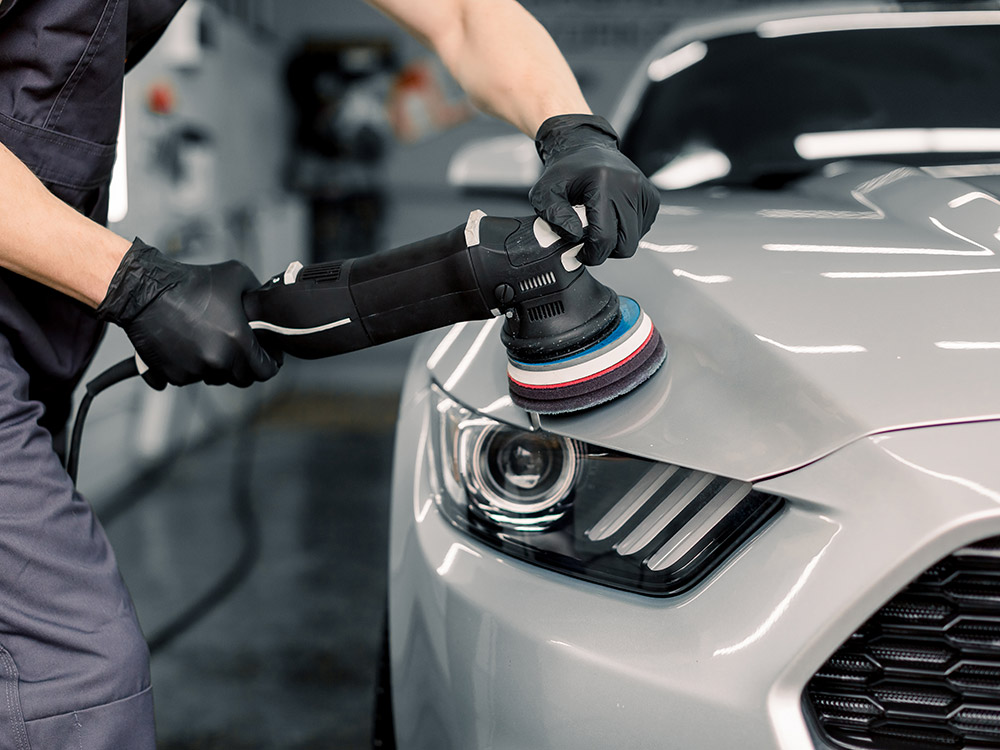
For most home enthusiasts:
- Use a dual-action (DA) polisher with a medium foam pad.
- Apply a small amount of all-in-one polish to the pad.
- Work in overlapping passes on a small section, then wipe off residue and inspect.
Take your time—quality polishing is about patience and control, not brute force.
Step 5: Protect with Wax, Sealant, or Ceramic Coat
Once the paint is clean and corrected, you’ll want to lock in the shine and protect against UV, dirt, and bird droppings.
Traditional Wax
- Warm glow and smooth feel.
- Shorter durability (weeks to a couple of months).
Synthetic Sealant
- Longer-lasting protection (several months).
- Often easier to apply and remove.
Spray Ceramic or SiO₂ Products
- Excellent water beading and slickness.
- Many are very user-friendly and ideal for DIYers.
Whichever you choose, apply thin, even layers and buff with quality microfiber towels. Avoid cheap, rough cloths that can reintroduce scratches.
Wheels, Tyres, and Trim
No professional detail is complete without attention to the “shoes” and finishing touches.
Wheels and Tyres
- Clean wheels with a dedicated wheel cleaner and soft brushes.
- Dress tyres with a water-based tyre dressing for a natural, satin finish (avoid greasy, sling-prone products).
Exterior Trim
- Restore faded plastic trims with a trim restorer or ceramic trim coating.
- Treat rubber seals lightly to keep them supple and reduce squeaks.
Interior Quick Refresh
Even if you’re focusing on the exterior, a quick interior tidy makes the whole car feel new again.
- Remove rubbish and personal items.
- Vacuum carpets, seats, and floor mats.
- Wipe hard surfaces with a gentle interior cleaner.
- Clean glass inside and out with a streak-free glass cleaner.
For cloth seats with visible stains, use a fabric cleaner and a soft brush, then blot with a microfiber towel.
Maintaining the Finish
Once you’ve done a full detail, it’s surprisingly easy to maintain:
- Use a gentle wash routine every 1–2 weeks.
- Top up protection with a spray sealant or quick detailer after washes.
- Immediately remove bird droppings or tree sap to avoid etching.
With just a bit of ongoing care, your car will continue to look freshly detailed, and you’ll find yourself actually looking forward to wash day—it’s productive, meditative, and deeply satisfying for any car enthusiast.