Caravan Electrical System Upgrades for Aussie Touring
Caravan and camper travel is part of the classic Australian lifestyle. From Big Lap adventures to long weekends at a beachside caravan park, having a reliable electrical system can be the difference between a comfortable trip and a frustrating, battery-anxiety-filled experience.
Modern caravans run fridges, lights, water pumps, fans, chargers, and sometimes even induction cooktops and air conditioning—often far away from powered sites. To keep everything humming, you need a well-designed 12V system tailored to how you actually camp.

Start with an Energy Audit
Before throwing money at bigger batteries and more solar, spend time understanding your actual power usage.
- List every 12V and 240V appliance you use: fridge, lights, fans, pump, TV, laptop chargers, etc.
- Note their current draw (amps) and typical daily usage (hours).
- Multiply amps × hours to estimate amp-hours (Ah) consumed per day.
For example:
- 12V fridge: 4A average × 12 hours = 48Ah
- LED lights: 1A × 4 hours = 4Ah
- Water pump: 5A × 0.3 hours = 1.5Ah
- Device charging: 3A × 3 hours = 9Ah
Total ≈ 62.5Ah per day. This rough figure helps size your batteries and solar correctly instead of guessing.
Battery Choices: AGM vs Lithium
Your battery bank is the heart of the caravan electrical system. In Australia, two main technologies dominate the touring scene:
AGM (Absorbent Glass Mat)
- Proven, robust, and relatively affordable.
- Heavy and bulky for the usable capacity.
- Typically only 50% of rated capacity is safely usable (e.g., 200Ah AGM ≈ 100Ah usable).
Lithium (LiFePO₄)
- Much lighter and more compact.
- Can often use 80–90% of rated capacity.
- Higher upfront cost but long lifespan and excellent performance.
For serious off-grid touring, many Australian travellers are upgrading to lithium, especially when space and weight are tight.

Charging Sources: Alternator, Solar, and Mains
To keep your batteries healthy, you’ll usually combine several charging methods.
1. Alternator Charging via DC-DC Charger
Modern vehicles—especially those with “smart” alternators—often require a DC-DC charger between the tow vehicle and caravan batteries. This:
- Protects both batteries by managing charge rates.
- Ensures lithium batteries get the correct charging profile.
- Can often accept solar input as well, simplifying wiring.
2. Roof-Mounted Solar
Solar is almost a necessity for extended off-grid camping in Australia’s sunny climate.
- Fixed panels on the roof provide constant charging while parked or driving.
- Add up your panel wattage: as a rough rule, 200–400W is a good starting point for modest off-grid setups.
- Use a quality MPPT solar regulator for better efficiency, especially in partial shade or mixed conditions.
3. Portable or Folding Panels
Portable panels let you chase the sun when your caravan is shaded by trees.
- Great for topping up when parked for several days.
- Make sure you use robust connectors and appropriately sized cable to minimise voltage drop.
4. Mains Hook-Up
When you’re on a powered site:
- A 240V charger (often part of a multi-function power system) keeps your house batteries topped up.
- Consider a charger with lithium-compatible charging modes if you’ve upgraded your bank.
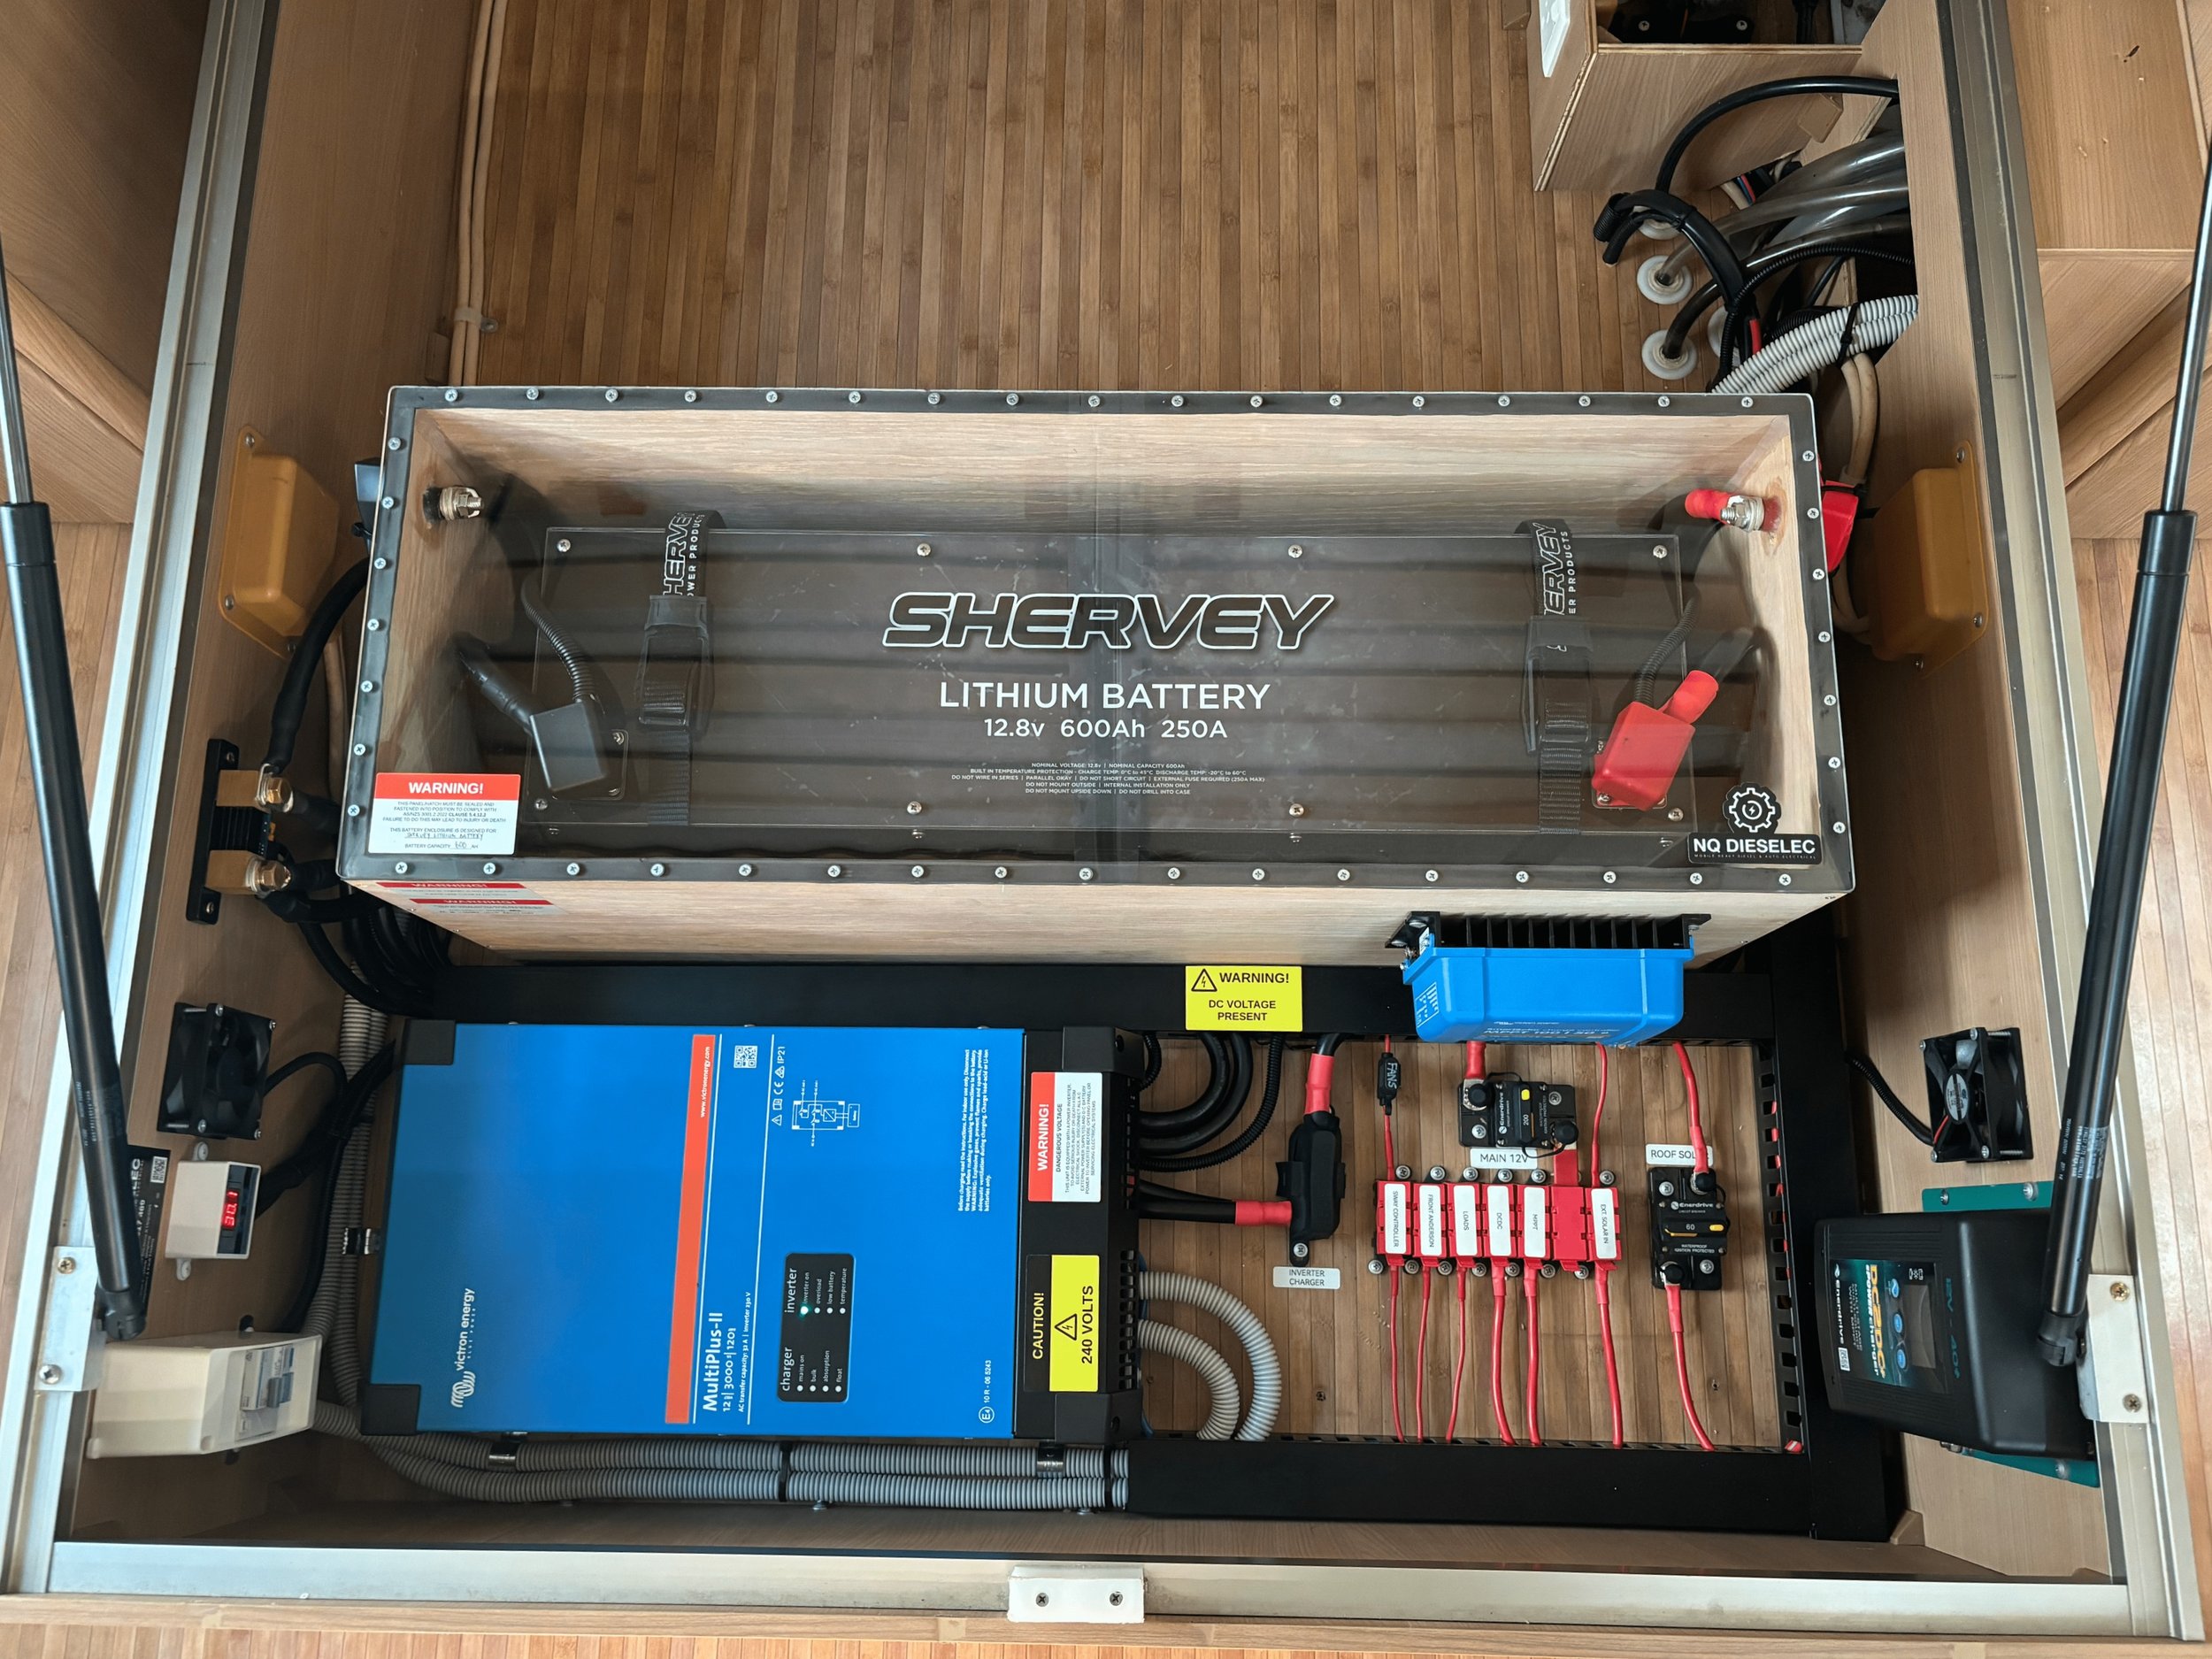
Wiring, Fusing, and Safety
Adding bigger batteries and more solar is only safe if the wiring and protection are up to the job.
Correct Cable Sizing
- Longer runs and higher current require thicker cable to avoid voltage drop.
- Undersized cables cause poor performance, heat build-up, and potential fire risk.
- Use cable sizing charts or online calculators when designing circuits for fridges, inverters, and chargers.
Fusing and Circuit Protection
- Every positive cable leaving a battery should be protected with a properly rated fuse or circuit breaker.
- Mount fuses as close to the battery as practical.
- Label circuits clearly so troubleshooting on the road is easier.
Connectors and Terminations
- Use quality crimp lugs and a proper crimping tool—no pliers or twisted wires.
- Heatshrink and cable loom help protect connections from dust and vibration.
Inverters: 240V Power on the Road
If you need to run 240V appliances (laptops, coffee machines, microwaves), you may add an inverter:
- Pure sine wave inverters are best for sensitive electronics.
- Size the inverter to your maximum expected load, but remember that big inverters can draw significant idle current.
- Be mindful of Australian electrical regulations—240V wiring must comply with local standards and may require a licensed electrician.
For many travellers, it’s more efficient to use dedicated 12V appliances (chargers, fridges, fans) and save the inverter for occasional use.
Real-World Australian Use Cases
Different camping styles demand different electrical priorities:
Weekend Warriors
- Mostly powered sites with the odd unpowered night.
- A single 100–150Ah AGM or lithium with 150–200W solar is often sufficient.
Big Lap Families
- Extended off-grid stays in national parks and free camps.
- 200–300Ah lithium, 400W+ solar, and a solid DC-DC charger provide real independence.
Remote Bush Camping
- Long distances between towns, heavy reliance on 12V refrigeration and communications.
- Redundancy is key: multiple charging methods, quality monitoring, and robust wiring.
Monitoring and Control
You can’t manage what you don’t measure. A good battery monitor or shunt-based system:
- Shows real-time amps in and out.
- Estimates state of charge (SOC).
- Helps you see the effect of adding loads or changing solar orientation.
Many modern caravan systems integrate monitoring with smartphone apps, letting you keep an eye on power from the comfort of your camp chair.
Planning Your Upgrade: Step-by-Step
- Audit your loads and decide how you want to camp (powered, off-grid, or mixed).
- Choose a battery chemistry and capacity based on your daily usage and desired autonomy days.
- Size solar and charging systems to comfortably replace your average daily consumption.
- Upgrade cabling, fuses, and distribution to safely handle the higher currents.
- Add monitoring so you can fine-tune usage and spot issues early.
With a well-thought-out electrical upgrade, your caravan becomes a self-contained home on wheels—capable of exploring Australia’s remote coastlines and outback campsites without constantly hunting for a power point.