
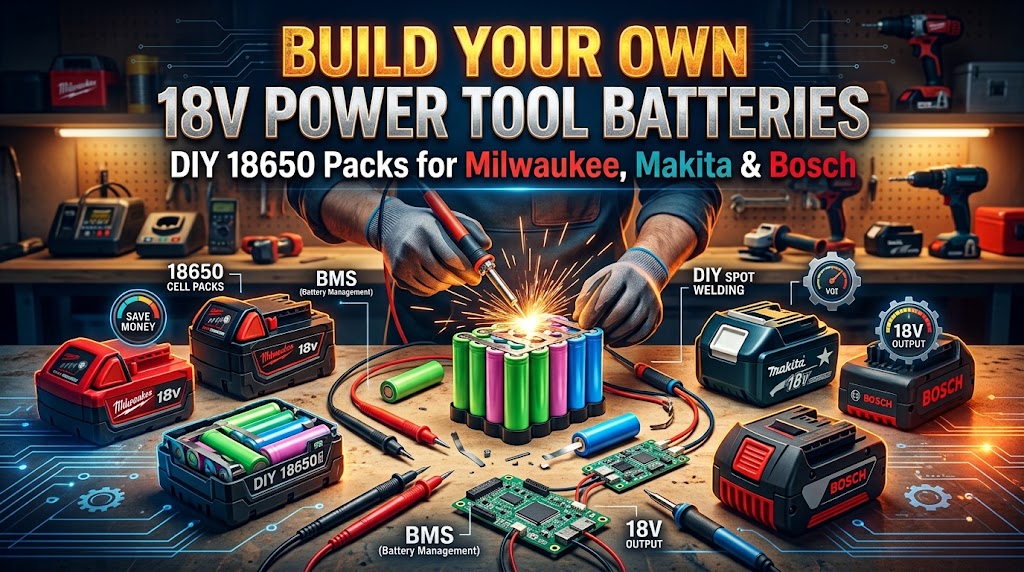
Build Your Own 18V Power Tool Batteries: DIY 18650 Packs for Milwaukee, Makita & Bosch
On this page(14 sections)
A genuine 5Ah 18V battery for your Milwaukee, Makita or Bosch drill costs about as much as a budget drill. Meanwhile, the cells inside it are standard 18650 lithium-ion cells: the same format found in laptop packs, flashlights and e-bikes.
With an empty battery housing, ten good cells, a spot welder and a careful afternoon, you can build your own pack for a fraction of the price. You can also bring a dead OEM pack back to life by replacing its cells.
This guide covers the whole process: how 18V packs are built, choosing (or salvaging and testing) cells, the tools you need, spot welding the pack, and the safety rules that matter most. Lithium cells store a lot of energy, so treat this as a serious project, not a quick hack.
Is It Worth It? The Honest Cost Comparison
Prices vary by region and change often, so treat these as rough ballparks:
| Option | Typical cost | Capacity | Notes |
|---|---|---|---|
| Genuine OEM 5Ah pack | $100–$200 | 5Ah | Warranty, brand electronics, best fit |
| Third-party "compatible" pack | $30–$60 | Often overstated | Quality is a lottery; capacity claims often fake |
| DIY with new high-drain cells | $45–$80 | 5–6Ah (5S2P) | You know exactly which cells are inside |
| DIY with salvaged laptop cells | $15–$30 | 3–5Ah | Only for low-drain tools (see below) |
| Re-cell a dead OEM pack | $35–$60 | Back to original or better | Keeps the original housing and electronics |
The sweet spot: re-celling a dead OEM pack, or building a 5S2P pack from new, branded high-drain cells. You save roughly half compared with a genuine pack, and you know exactly what's inside. Salvaged cells are cheaper still, but they come with real limits.
Before you start: opening or building a pack voids any warranty, and a home-built pack may not be covered by your insurance if something goes wrong. If you're not comfortable with that, buy genuine packs.
How an 18V Tool Battery Is Built
Every "18V" (or "20V max") tool pack from Milwaukee, Makita and Bosch uses the same basic layout:
- 5 cells in series (5S): 5 × 3.6V nominal = 18V (21V when fully charged; the "20V max" US marketing uses this number).
- 1, 2 or 3 cells in parallel (1P/2P/3P) for capacity: 5S1P is about 2–3Ah, 5S2P is about 4–6Ah, and 5S3P is about 6–9Ah.
- A protection or management board that monitors the cells, communicates with the tool and charger, and cuts power on over-current or over-discharge.
| Pack size | Cells | Typical capacity |
|---|---|---|
| Compact (5S1P) | 5 | 2.0–3.0Ah |
| Standard (5S2P) | 10 | 4.0–6.0Ah |
| High capacity (5S3P) | 15 | 6.0–9.0Ah |
Some newer high-output packs (Milwaukee High Output, Bosch ProCORE, Makita's larger packs) use bigger 21700 cells. The process is the same, but you need a housing designed for 21700s.
Brand electronics matter
The pack's board isn't just a fuse. The brands handle it differently:
- Makita LXT packs contain a protection board (and on newer packs, a chip the tool and charger talk to). Aftermarket "BL1860-style" housing kits usually come with a compatible protection PCB and charge indicator.
- Milwaukee M18 packs contain electronics that report pack status to the tool and charger. Aftermarket M18 housing kits come with a board. Check reviews for charger compatibility before you buy.
- Bosch 18V packs also carry protection electronics. Housing kits are available with a matching PCB.
Rule of thumb: buy a housing kit that includes the protection board for your brand, and check buyer reviews that confirm it charges on the genuine charger. When re-celling an OEM pack, you keep the original board, which is the most compatible option.
Choosing Cells: The Most Important Decision
A drill or impact driver can pull 20–40A+ in short bursts, and angle grinders and saws even more. That's why the cells matter more than anything else in this project.
New high-drain cells (recommended)
Buy from a reputable battery supplier and choose cells rated for power tools. Well-known options include:
| Cell | Capacity | Continuous discharge |
|---|---|---|
| Samsung 25R | 2500mAh | 20A |
| Samsung 30Q | 3000mAh | 15A |
| Molicel P26A / P28A | 2600 / 2800mAh | 25–35A |
| LG HG2 | 3000mAh | 20A |
| Sony/Murata VTC6 | 3000mAh | 15A |
In a 5S2P pack the load is shared by two cells per group, so each cell sees half the current. That's why 5S2P packs handle heavy tools far better than 5S1P.
Fake cells are everywhere. Any 18650 claiming 5000–9900mAh is fake (the realistic maximum is about 3500mAh). Buy from specialist battery vendors, not random marketplace listings.
Salvaged laptop cells: cheap, but know the limits
Old laptop packs are a great source of free 18650s, but most laptop cells are low-drain energy cells, rated at only about 2–5A continuous. In a drill or grinder they get hot, sag badly, and age fast.
Use salvaged cells for: LED work lights, fans, radios, glue guns, inflators and soldering irons (with a DC adapter). These are all low, steady loads.
Don't use salvaged cells for: drills under load, impact drivers, grinders, circular saws, or anything high-current.
Tools and Materials
Essentials
| Tool | Why you need it | Budget tip |
|---|---|---|
| Spot welder | Joins nickel strip to cells without overheating them | A capacitor- or LiPo-powered kit welder (e.g. kWeld-style) or a bench unit; avoid weak "pocket" welders |
| Digital multimeter | Measuring voltages, checking polarity and continuity | Any decent DMM; see our oscilloscope guide for more test gear |
| Internal resistance (IR) meter | Matching cells and spotting worn ones | YR1035-style 4-wire meters are affordable and accurate |
| Charger/analyzer | Measuring real capacity, not the label | Hobby units that do charge → discharge → charge cycles |
| Pure nickel strip | Connections between cells | 0.15–0.2mm pure nickel; avoid nickel-plated steel |
| Fish paper / insulator rings | Prevents shorts at the positive terminals | Self-adhesive rings for 18650 tops |
| Cell spacers / holders | Keeps cells aligned and spaced | Often included with housing kits |
| Kapton tape and heat-shrink | Insulation and wrap | Get large-diameter PVC heat-shrink for the finished block |
| Housing kit with board | The shell and protection electronics | Brand-specific (see above) |
Safety gear (non-negotiable)
- Safety glasses
- Insulated tweezers and side cutters. A metal tool across a cell group can arc instantly.
- A fireproof surface (ceramic tile or a metal tray) and a LiPo-safe bag for charging tests
- A fire extinguisher nearby, and a bucket of sand for a smouldering cell
Step 1: Test Every Cell
Never skip testing, even with new cells. The goal is a set of healthy, matched cells.
1. Visual inspection
Discard any cell with dents, rust, a torn wrapper (rewrap it at minimum), or signs of leaking or venting.
2. Voltage check
Measure each cell with your multimeter:
| Resting voltage | Action |
|---|---|
| 3.0–4.2V | Normal; continue testing |
| 2.5–3.0V | Usable if it recharges normally; watch it closely |
| Below 2.0–2.5V for a long time | Discard. Deeply discharged cells can develop internal damage |
| 0V | Discard |
3. Capacity test
Run each cell through a full charge → discharge → charge cycle on your analyzer, and write the result on the cell with a marker. Discard cells below about 70–80% of their rated capacity.
4. Internal resistance
Measure IR with the 4-wire meter. Healthy high-drain cells typically read in the low tens of milliohms. Salvaged cells with much higher readings are worn. Cells in the same pack should be close to each other.
5. Self-discharge test (important for salvaged cells)
Charge to 4.2V, let the cells rest 2–4 weeks, then measure again. Any cell that has dropped noticeably more than the others (more than about 0.05–0.1V) has internal leakage and should be discarded. This catches the cells most likely to cause trouble later.
Step 2: Match and Plan the Pack
For a 5S2P pack:
- Pick your 10 best cells with similar capacity and IR.
- Pair them into 5 parallel groups so each group has about the same total capacity. For example, pair a 2,950mAh cell with a 2,850mAh one.
- Fit the cells into the housing's spacers in the orientation shown in the kit's diagram, alternating so the series connections run in a zig-zag.
- Fit an insulator ring on every positive terminal before welding.
Never mix old and new cells, different cell models, or cells at different charge levels in one pack. Charge or discharge all cells to the same voltage (within about 0.05V) before connecting them in parallel. Joining cells at different voltages makes a large current flow between them.
Step 3: Spot Weld the Nickel Strip
Why spot weld instead of solder? Soldering directly onto a cell pumps heat into it, which can damage the seal and internal structure. A spot welder makes the joint in milliseconds with very little heat.
- Practise first on a dead cell. Adjust the welder until you get solid welds that you can't peel off by hand without tearing the nickel.
- Weld the parallel connections first: join the two cells in each group, positive to positive and negative to negative.
- Weld the series connections, joining each group's positive to the next group's negative, following the kit diagram.
- Use 2–4 weld spots per cell, and keep the strip flat and tight.
- Use wider or doubled strip on the main path (B− and B+) to handle high current.
- Check after each connection: the voltage should step up by about 3.6–4.2V with each group in series (for example 3.8 → 7.6 → 11.4 → 15.2 → 19V).
Step 4: Connect the Protection Board
- Identify the board's pads: B−, B1, B2, B3, B4 (balance taps between groups) and B+.
- Connect them in order from B− upward, measuring each tap with your multimeter before soldering it to the board. Solder only to the nickel strip, never to a cell, and keep it quick.
- Use thick wire or strip for B− and B+, and thin silicone wire for the balance taps.
- Double-check every voltage at the board's connector before closing the housing.
A wrong balance-tap order is the most common way to destroy a protection board, so measure twice and solder once.
Step 5: Insulate, Assemble and Test
- Add fish paper over the welded tops and Kapton on any sharp nickel edges.
- Shrink-wrap the cell block if it fits the housing.
- Make sure nothing can move or rub inside the case. Use foam pads if needed.
- Close the housing and check the terminal voltage (16–21V depending on charge).
- First charge on the genuine charger, on a fireproof surface, while you watch. Check for heat at the end.
- Try a light-load tool first, then gradually heavier ones. After a hard run, feel the pack. It should be warm, never hot.
Re-celling a Dead OEM Pack
Often the cheapest and most compatible route: one weak cell group usually kills the whole pack.
- Open the housing (usually security Torx screws).
- Photograph everything, especially the board's connections and the cell orientation.
- Measure each group's voltage. One group much lower than the rest is the usual culprit.
- Cut the nickel strip away from the board carefully, keeping the board's wires and pads intact.
- Replace all cells with a new matched set. Replacing only one group with new cells leaves the pack unbalanced.
- Weld, reconnect the board exactly as photographed, insulate, and test as above.
Some packs lock themselves after a deep fault. Their board may need specialist reset tools, so research your specific model before buying cells.
Safety Rules Worth Printing Out
- Never short a cell or group. Remove rings and watches, and use insulated tools.
- Never solder directly to cells.
- Never mix cell types, ages or charge levels in one pack.
- Never use cells you can't identify, or cells with damaged wraps or dents.
- Never leave a DIY pack charging unattended or overnight, especially the first few times.
- Always charge on a non-flammable surface, away from anything that can burn.
- Always keep a fire extinguisher and sand nearby. Lithium cells in thermal runaway produce toxic smoke, so ventilate and get away from it.
- Recycle rejected cells at a battery drop-off point. Never put them in household waste.
Bonus: Use Your Packs Beyond Power Tools
With an inexpensive battery adapter (18V pack → 12V/USB/DC barrel), your packs can power:
- LED work lights and fans in the workshop
- A USB soldering iron for field soldering
- Small DIY electronics projects
Want a bigger battery bank? See our DIY portable power station build.
FAQ
Can I build a pack with salvaged laptop cells for my drill? It'll run, but laptop cells are usually low-drain (around 2–5A). Under drill loads they overheat, sag and wear out quickly. Use new high-drain cells for drills, impacts, grinders and saws; save salvaged cells for lights, fans and radios.
Will a DIY pack work with the genuine charger? Re-celled OEM packs use the original board, so yes. Aftermarket housings depend on the included board, so check reviews that confirm charging on your brand's genuine charger.
Is 5S2P or 5S1P better? 5S2P. It doubles capacity and halves the current each cell carries, so it runs cooler and lasts longer.
Do I really need a spot welder? For a safe, durable pack, yes. Soldering heats the cells and can damage them. A decent kit spot welder is a one-time purchase that pays for itself after a pack or two.
Can I use 21700 cells in an 18650 housing? No. 21700 cells are larger (21mm × 70mm). Use a housing designed for 21700s, or stay with 18650s.
How long will a DIY pack last? With quality high-drain cells and sensible use, comparable to a genuine pack: typically several hundred cycles before capacity drops noticeably.
The Bottom Line
Building your own 18V power tool batteries is a satisfying, money-saving project, as long as you respect the cells. Test everything, match carefully, spot weld rather than solder, use the right protection board, and choose high-drain cells for high-drain tools. Do that, and you'll have packs that match the genuine ones for roughly half the price, plus a pile of tested cells for your next project.

