
Tailscale vs WireGuard: The Best Way to Reach Your Homelab Remotely

On this page(11 sections)
Tailscale vs WireGuard is not really a fight: Tailscale is built on WireGuard and adds automatic NAT traversal, key management and a friendly admin panel on top. If you can forward a UDP port and want zero third parties, plain WireGuard is fast, simple and fully under your control. If you are behind CGNAT, have lots of devices, or want remote access working in five minutes, Tailscale (or self-hosted Headscale) is the easier answer.
Below we cover how the two relate, where each shines, and copy-paste setups for both.
Tailscale vs WireGuard: Quick Comparison
| WireGuard | Tailscale | |
|---|---|---|
| What it is | VPN protocol and kernel module | Mesh VPN service built on WireGuard |
| Topology | Hub and spoke (usually) | Mesh: devices connect directly to each other |
| Port forwarding needed | Yes, one UDP port | No |
| Works behind CGNAT | Not without a relay VPS | Yes |
| Key management | Manual, per device | Automatic |
| Setup time | 30–60 minutes | 5–10 minutes |
| Third party involved | None | Tailscale's coordination server (or your own Headscale) |
| Access control | AllowedIPs plus firewall rules | ACLs/grants in a central policy file |
| Cost | Free | Free Personal plan; paid plans for teams |
| Best for | Simple, fully self-hosted access | Many devices, CGNAT, minimal maintenance |
How Tailscale and WireGuard Relate
WireGuard: the protocol and the tool
WireGuard is a modern VPN protocol that has been part of the Linux kernel since 5.6. It is tiny compared to OpenVPN or IPsec, uses modern cryptography with no cipher negotiation, and is very fast. Each device has a key pair, and each peer is defined in a config file with its public key and the IP ranges it is allowed to use.
What WireGuard deliberately does not do is handle discovery or key distribution. You generate keys, copy public keys between machines, pick IP addresses, and open a port. That simplicity is a feature, but it becomes tedious once you have more than a handful of devices.
Tailscale: WireGuard plus a control plane
Tailscale takes WireGuard tunnels and adds the missing pieces:
- Coordination server: devices log in with an identity provider (Google, Microsoft, GitHub, Apple and others), and the server distributes public keys and network maps. Your private keys never leave your devices.
- NAT traversal: devices punch through firewalls and NAT to connect directly, peer to peer.
- DERP relays: if a direct connection is impossible, traffic is relayed (still end-to-end encrypted) through Tailscale's relay servers. Peer relays let you nominate one of your own well-connected nodes to do that job instead.
- MagicDNS: every device gets a name like
nasorproxmoxthat resolves anywhere on your tailnet. - Policy file: central access rules decide which users and devices may reach what.
Your traffic is still WireGuard-encrypted end to end. The difference is who manages keys and connections.
NAT Traversal and CGNAT: The Biggest Difference
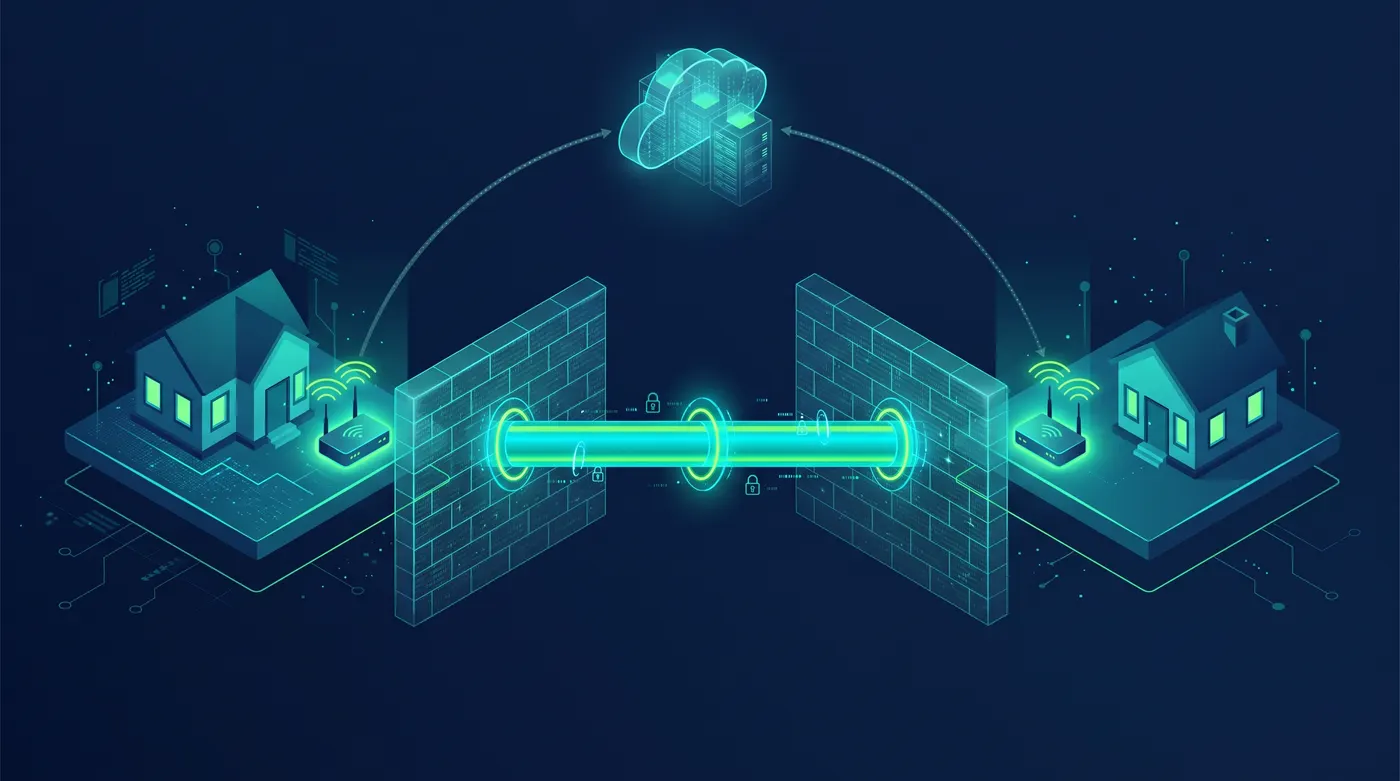
Classic WireGuard needs your home server to be reachable from the internet on one UDP port (51820 by default). That requires two things:
- A public IPv4 address (or working IPv6 on both ends)
- A port forward on your router
Many connections fail the first test. Starlink, most mobile and 5G home internet, and a growing number of fibre ISPs use CGNAT, where you share a public IP with other customers and cannot forward ports at all. If you are on Starlink, our Starlink rural setup guide explains why.
Tailscale sidesteps this. Both ends make outbound connections, use the coordination server to exchange addresses, and punch a hole through their respective NATs. Most of the time that yields a direct connection; when it does not (strict corporate or hotel networks), traffic falls back to a relay. No port forwards, no dynamic DNS, no exposed ports.
The plain-WireGuard workaround for CGNAT is a cheap VPS with a public IP acting as the hub, with your home server connecting out to it. It works well, but it is one more machine to maintain.
Setup Effort Compared
Setting up plain WireGuard
On a Debian or Ubuntu server (an LXC container on Proxmox works too), install the tools and generate keys:
sudo apt install wireguard
wg genkey | tee server.key | wg pubkey > server.pub
wg genkey | tee laptop.key | wg pubkey > laptop.pub
Create /etc/wireguard/wg0.conf on the server. This example gives VPN clients the 10.8.0.0/24 range and NATs them onto the home LAN through eth0:
[Interface]
Address = 10.8.0.1/24
ListenPort = 51820
PrivateKey = <contents of server.key>
PostUp = iptables -A FORWARD -i wg0 -j ACCEPT; iptables -t nat -A POSTROUTING -o eth0 -j MASQUERADE
PostDown = iptables -D FORWARD -i wg0 -j ACCEPT; iptables -t nat -D POSTROUTING -o eth0 -j MASQUERADE

[Peer]
# laptop
PublicKey = <contents of laptop.pub>
AllowedIPs = 10.8.0.2/32
Enable IP forwarding and start the tunnel:
echo 'net.ipv4.ip_forward = 1' | sudo tee /etc/sysctl.d/99-wireguard.conf
sudo sysctl -p /etc/sysctl.d/99-wireguard.conf
sudo systemctl enable --now wg-quick@wg0
The client config (import it into the WireGuard app on Windows, macOS, iOS or Android) uses split tunnelling, so only homelab traffic goes through the VPN:
[Interface]
PrivateKey = <contents of laptop.key>
Address = 10.8.0.2/32
DNS = 192.168.1.53

[Peer]
PublicKey = <contents of server.pub>
Endpoint = home.example.com:51820
AllowedIPs = 10.8.0.0/24, 192.168.1.0/24
PersistentKeepalive = 25
Finally, forward UDP 51820 on your router to the server, and point home.example.com at your home IP with a dynamic DNS service. Change AllowedIPs on the client to 0.0.0.0/0 if you want all traffic to go through home, which is handy on public Wi-Fi.
If your router is OPNsense, you can skip the separate server entirely: WireGuard is built in. See the OPNsense N100 router build.
WireGuard in Docker
Prefer containers? The linuxserver.io image generates server and peer configs (with QR codes for phones) for you:
services:
  wireguard:
    image: lscr.io/linuxserver/wireguard:latest
    container_name: wireguard
    cap_add:
      - NET_ADMIN
    environment:
      - PUID=1000
      - PGID=1000
      - TZ=Etc/UTC
      - SERVERURL=home.example.com
      - SERVERPORT=51820
      - PEERS=laptop,phone
      - PEERDNS=auto
      - INTERNAL_SUBNET=10.13.13.0
      - ALLOWEDIPS=10.13.13.0/24,192.168.1.0/24
    volumes:
      - ./config:/config
    ports:
      - 51820:51820/udp
    sysctls:
      - net.ipv4.conf.all.src_valid_mark=1
    restart: unless-stopped
Run docker logs wireguard to see the QR codes, or grab the peer files from ./config. wg-easy is another popular option if you want a web UI for adding clients.
Setting up Tailscale
On a Linux host:
curl -fsSL https://tailscale.com/install.sh | sh
sudo tailscale up
Open the login link, sign in, and the machine appears in your tailnet. Install the Tailscale app on your phone and laptop, sign in with the same account, and you can reach the server by its MagicDNS name. That is genuinely the whole setup.
Subnet Routers and Exit Nodes
Installing Tailscale on every server is fine, but you often want to reach devices that cannot run it: a printer, an IP camera, the Proxmox web UI, or your NAS. That is what a subnet router does.
# Allow the machine to forward traffic
echo 'net.ipv4.ip_forward = 1' | sudo tee -a /etc/sysctl.d/99-tailscale.conf
echo 'net.ipv6.conf.all.forwarding = 1' | sudo tee -a /etc/sysctl.d/99-tailscale.conf
sudo sysctl -p /etc/sysctl.d/99-tailscale.conf

# Advertise the home LAN and offer this machine as an exit node
sudo tailscale up --advertise-routes=192.168.1.0/24 --advertise-exit-node
Then approve the route and exit node in the Tailscale admin console. Linux clients need --accept-routes to use subnet routes; the phone and desktop apps accept them by default.
An exit node sends all of a device's internet traffic through your home connection, which is the Tailscale equivalent of a full-tunnel WireGuard config. It is great for hotel Wi-Fi or for using home streaming services while travelling. For more on that use case, see our home VPN privacy guide.
Tailscale in Docker as a subnet router
If you would rather keep it in a container, the official image works with host networking:
services:
  tailscale:
    image: tailscale/tailscale:latest
    container_name: tailscale
    hostname: homelab-gateway
    network_mode: host
    environment:
      - TS_AUTHKEY=tskey-auth-REPLACE_ME
      - TS_STATE_DIR=/var/lib/tailscale
      - TS_USERSPACE=false
      - TS_ROUTES=192.168.1.0/24
      - TS_EXTRA_ARGS=--advertise-exit-node
    volumes:
      - ./tailscale-state:/var/lib/tailscale
    devices:
      - /dev/net/tun:/dev/net/tun
    cap_add:
      - NET_ADMIN
    restart: unless-stopped
Generate the auth key in the admin console, and remember IP forwarding still has to be enabled on the host. On Proxmox, a small LXC container with /dev/net/tun passed through makes a tidy dedicated subnet router; our Proxmox on N100 guide covers LXC basics.
Self-Hosting the Control Plane with Headscale
Like the Tailscale experience but not the idea of a company running your coordination server? Headscale is an open-source implementation of the Tailscale control server. You keep using the official Tailscale clients; they just log in to your server instead.
A minimal Docker Compose setup:
services:
  headscale:
    image: headscale/headscale:latest   # pin a specific release in production
    container_name: headscale
    command: serve
    volumes:
      - ./config:/etc/headscale
      - ./data:/var/lib/headscale
    ports:
      - 8080:8080
    restart: unless-stopped
Put Headscale behind a reverse proxy with a valid certificate (our Traefik reverse proxy guide covers this), set server_url in config.yaml to that public HTTPS address, create a user and a pre-auth key with the headscale CLI, then point clients at it:
sudo tailscale up --login-server https://headscale.example.com --auth-key <your-preauth-key>
CLI flags have changed between Headscale releases, so follow the docs for the version you install.
Trade-offs to know about:
- Headscale is still pre-1.0 and supports a single tailnet, which is fine for a household.
- New Tailscale features sometimes arrive in Headscale later, or not at all.
- Your Headscale server needs a public address, so you are back to needing one reachable host (a cheap VPS works well).
- You still need DERP relays for hard NAT cases. Headscale can use Tailscale's public relays or run its own embedded DERP server.
- Community web UIs such as Headplane exist if you do not want to manage everything from the command line.
Performance: Is Tailscale Slower Than WireGuard?
On Linux, plain WireGuard runs in the kernel. Tailscale uses a userspace WireGuard implementation (wireguard-go) that Tailscale has optimised heavily over the years. On modern hardware, a direct Tailscale connection and a kernel WireGuard tunnel both move far more data than a typical home upload connection can supply.
That is the key point: for remote homelab access, your home upload speed is almost always the bottleneck, not the VPN. An N100 mini PC handles either comfortably.
Where Tailscale can be noticeably slower is when a connection is relayed through DERP. Relayed traffic takes a detour and has higher latency and lower throughput. Check with:
tailscale status
tailscale ping nas
If you see "via DERP" rather than a direct address, try enabling UPnP or NAT-PMP on your router, or set up a peer relay on a well-connected node. If you are choosing hardware for a VPN gateway, our mini PC home server guide compares the options.
Security and Trust Model
WireGuard
- No third party at all. Keys live on your devices and nowhere else.
- Stealthy by design: WireGuard does not reply to packets that are not from a known peer, so a port scan sees nothing on UDP 51820.
- You own the key hygiene: removing a lost phone means editing configs and restarting the tunnel.
- You own the attack surface: one open port, but a very small, well-audited codebase behind it.
Tailscale
- No open ports at home, which many people find reassuring.
- Private keys stay on your devices, and traffic is end-to-end encrypted, including through relays.
- The coordination server sees metadata: device names, tailnet IPs, and when devices connect. It does not see your traffic.
- Your identity provider is the front door. Protect that Google, Microsoft or GitHub account with strong two-factor authentication.
- Tailnet Lock requires new devices to be signed by your own trusted nodes, so even the coordination server cannot sneak a device into your network.
- Node keys expire periodically by default; disable expiry on servers you trust so they do not drop off unexpectedly.
Whichever you pick, a VPN only controls who gets in. Segmenting your network and locking down services still matters; see our home network security fundamentals.
When to Use Each
Choose plain WireGuard if:
- You have a public IP and can forward a port
- You only need a few devices (a phone and a laptop, say)
- You want no third-party service in the loop at all
- Your router already supports it, as OPNsense does
Choose Tailscale if:
- You are behind CGNAT (Starlink, 5G home internet, many fibre ISPs)
- You want devices to reach each other directly, not just reach home
- You want to share access with family without handing out config files
- You value low maintenance over total control
Choose Headscale if:
- You want the Tailscale experience with no external control server
- You already run a VPS and are comfortable maintaining one more service
Plenty of homelabbers run both: WireGuard on the firewall as a fully self-hosted backup path, and Tailscale for everyday convenience. If your firewall software is still undecided, see OPNsense vs pfSense on an N100; both support WireGuard and Tailscale.
FAQ
Is Tailscale just WireGuard?
Tailscale uses the WireGuard protocol for its encrypted tunnels, so your data is protected by WireGuard either way. What Tailscale adds is the control plane: identity-based login, automatic key distribution, NAT traversal, relays, MagicDNS and central access rules.
Is Tailscale free for a homelab?
Yes. The free Personal plan is meant for non-commercial use and currently allows up to six users with generous device limits, which covers almost any household. Limits have changed over the years, so check Tailscale's pricing page for the current numbers.
Is WireGuard faster than Tailscale?
Depending on the platform, either can come out slightly ahead in raw throughput benchmarks, but for homelab access the difference rarely matters because your home upload speed is the limit. The bigger factor is whether Tailscale gets a direct connection; relayed DERP connections are slower.
Does Tailscale work behind CGNAT or Starlink?
Yes, and that is one of its biggest advantages. Both ends connect outbound, so no port forwarding or public IP is needed. Plain WireGuard cannot accept inbound connections behind CGNAT without a relay VPS.
Can I use Tailscale and WireGuard together?
Yes. Many people keep a WireGuard server on their firewall as a backup path that does not depend on any external service, and use Tailscale day to day. They run happily side by side as long as their IP ranges do not overlap.
Is Headscale a good replacement for Tailscale?
For a single household, yes, if you are comfortable running a public-facing server. You keep the official Tailscale apps and lose the dependence on Tailscale's coordination server, at the cost of maintaining it yourself and waiting longer for new features.
Conclusion
For most homelabbers, Tailscale is the fastest route to reliable remote access, especially behind CGNAT, while plain WireGuard remains the choice when you want zero third parties and can open a port. They share the same encryption, so this is a choice about convenience and trust, not security strength. Start with Tailscale if you want it working tonight, add a WireGuard backup on your firewall when you have an evening spare, and consider Headscale once you are ready to self-host the whole stack.